
The first step was getting the forwarded file ready for printing.
For example, we split the 3D model into 4 printable parts.
In addition, we also had to provide inlets where the wooden plates can be glued into after sanding and leveling.
We did this by using boolean operators in Blender3D.
We then printed out the parts with a layer height of .2mm and a layer thickness of .6mm.
By increasing the layer thickness, we obtain a stronger print with fewer printing hours.
An additional challenge was aligning the various modules to each other. After all, the circuit boards of the FDM printers are never completely straight...
Finally, we filled all the deviations with filler and then sanded them straight.
This is followed by sanding with 5 different strengths: P60, P80, P120, P220 and finally P320
From P120, we add filler to the model. This step is repeated for each abrasion strength to achieve an even result.
After the model has been completely dusted, we start gluing in the various wooden connectors.
To make this process as efficient as possible, we printed out various templates before the start.
This allows us to quickly cut out different surfaces without having to measure all sizes over and over again.
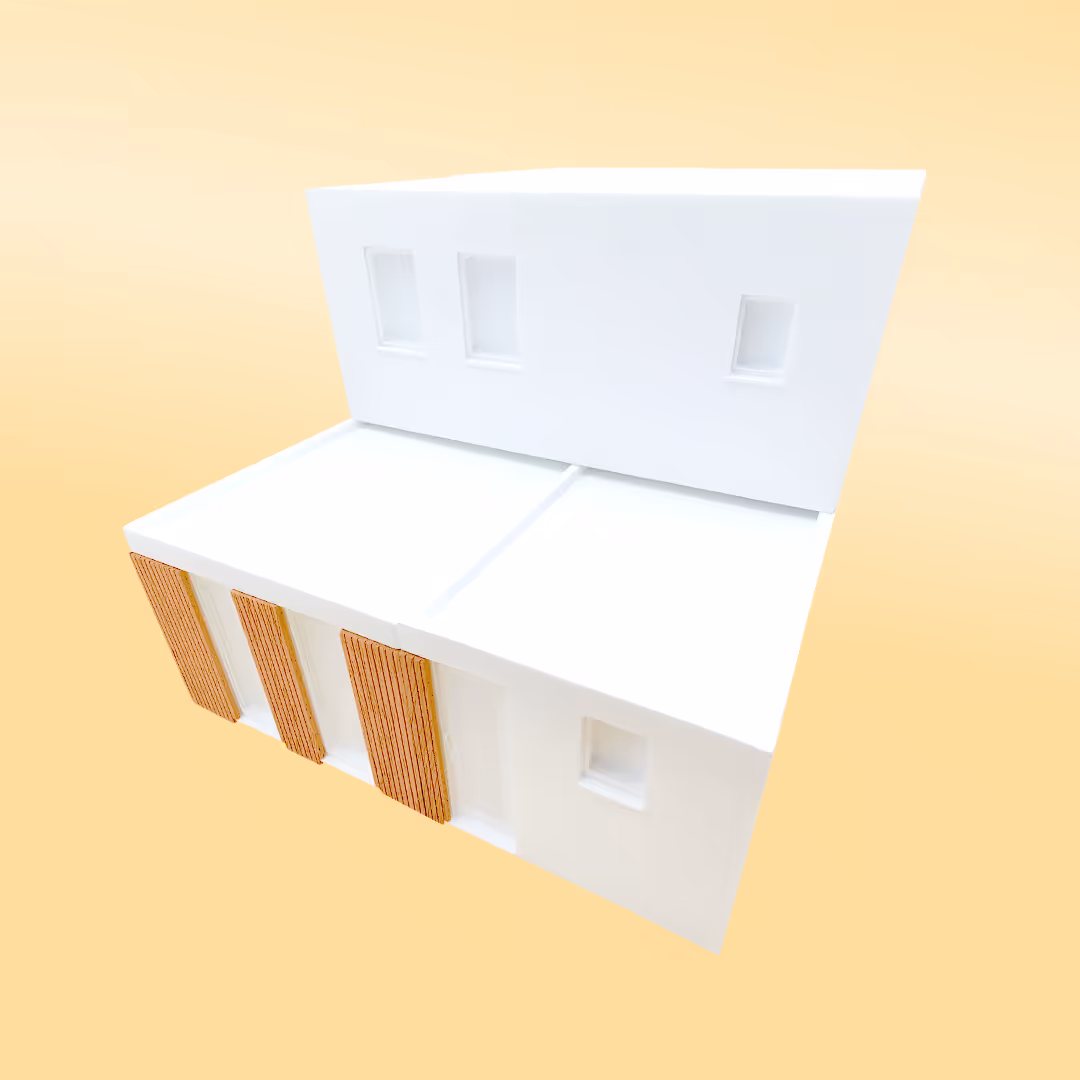
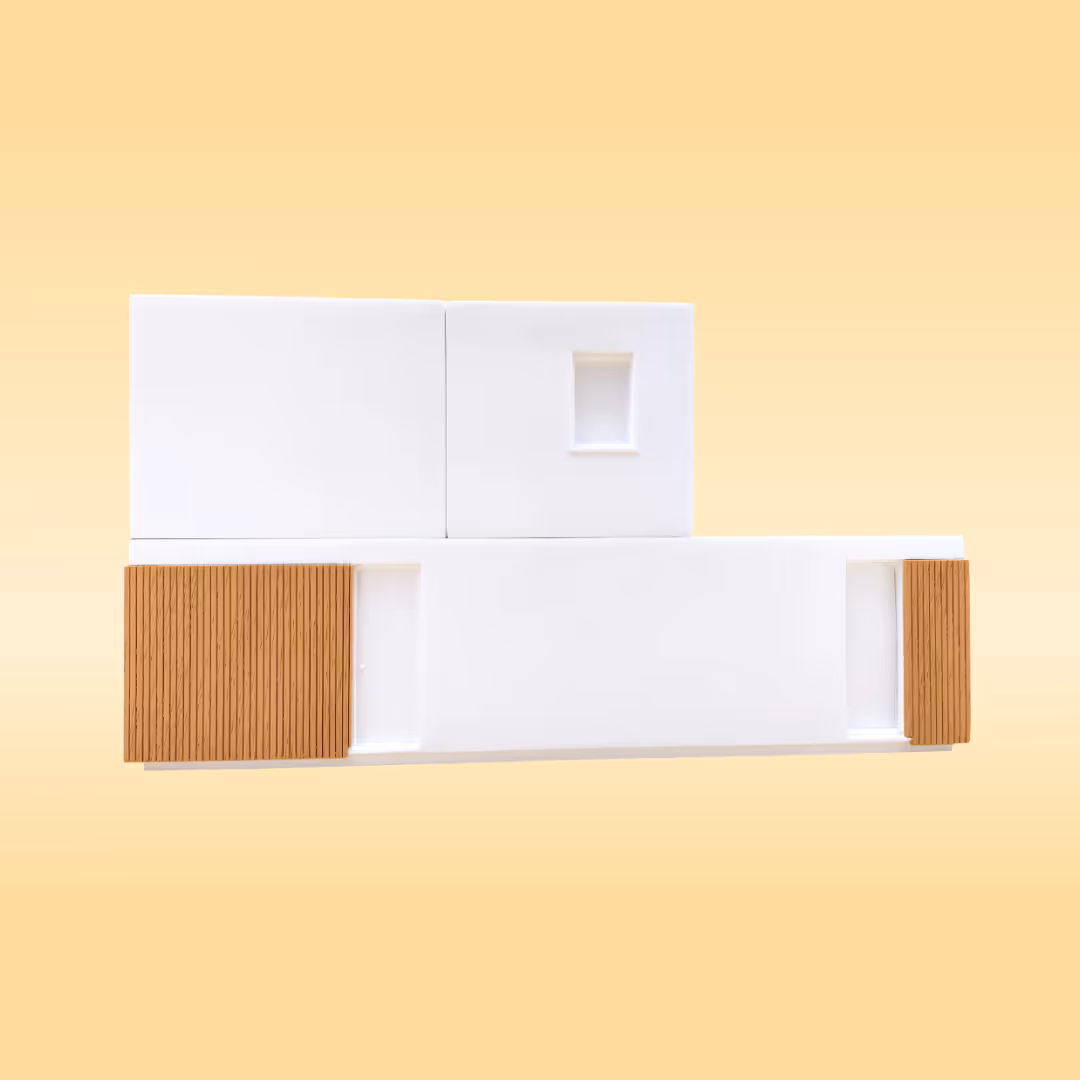
For Ecohuis/Brensj, we printed an architectural model in 4 different compartments.
These compartments can then be disassembled to view the inside of the home.
All parts have been completely sanded and then leveled with filler, so the final model has a smooth finish and you no longer see print lines.
Film props with complex finishes, technical prototypes, creative branding, promotional gifts, personalized items, custom 3D designs and more.